
Citroën CX Oil Filter Relocation
When was the last time you changed your oil filter? Depending on the model and year of CX you own, getting to the oil filter varies in difficulty. Regardless of year, however, none of them are what could be described as easy to get at. For those unfamiliar with the CX oil filter location, it is positioned at the rear of the engine pointing down at about a 45-degree angle, just within the sub-frame. You access it from underneath the car, reaching up from behind the sub-frame. (On the earliest models, up to 1978, you could remove the spare tire and reach in from the top. But the later heater/AC fan design prevents that.)
The Series II CX, with the electrically adjusted suspension, makes it extremely difficult to reach the oil filter. One web site even describes moving the exhaust by disconnecting the front mount on the sub-frame, and removing a shield around the suspension motor! Clearly this is a great candidate for relocating the filter, but to where?
Where to put it?
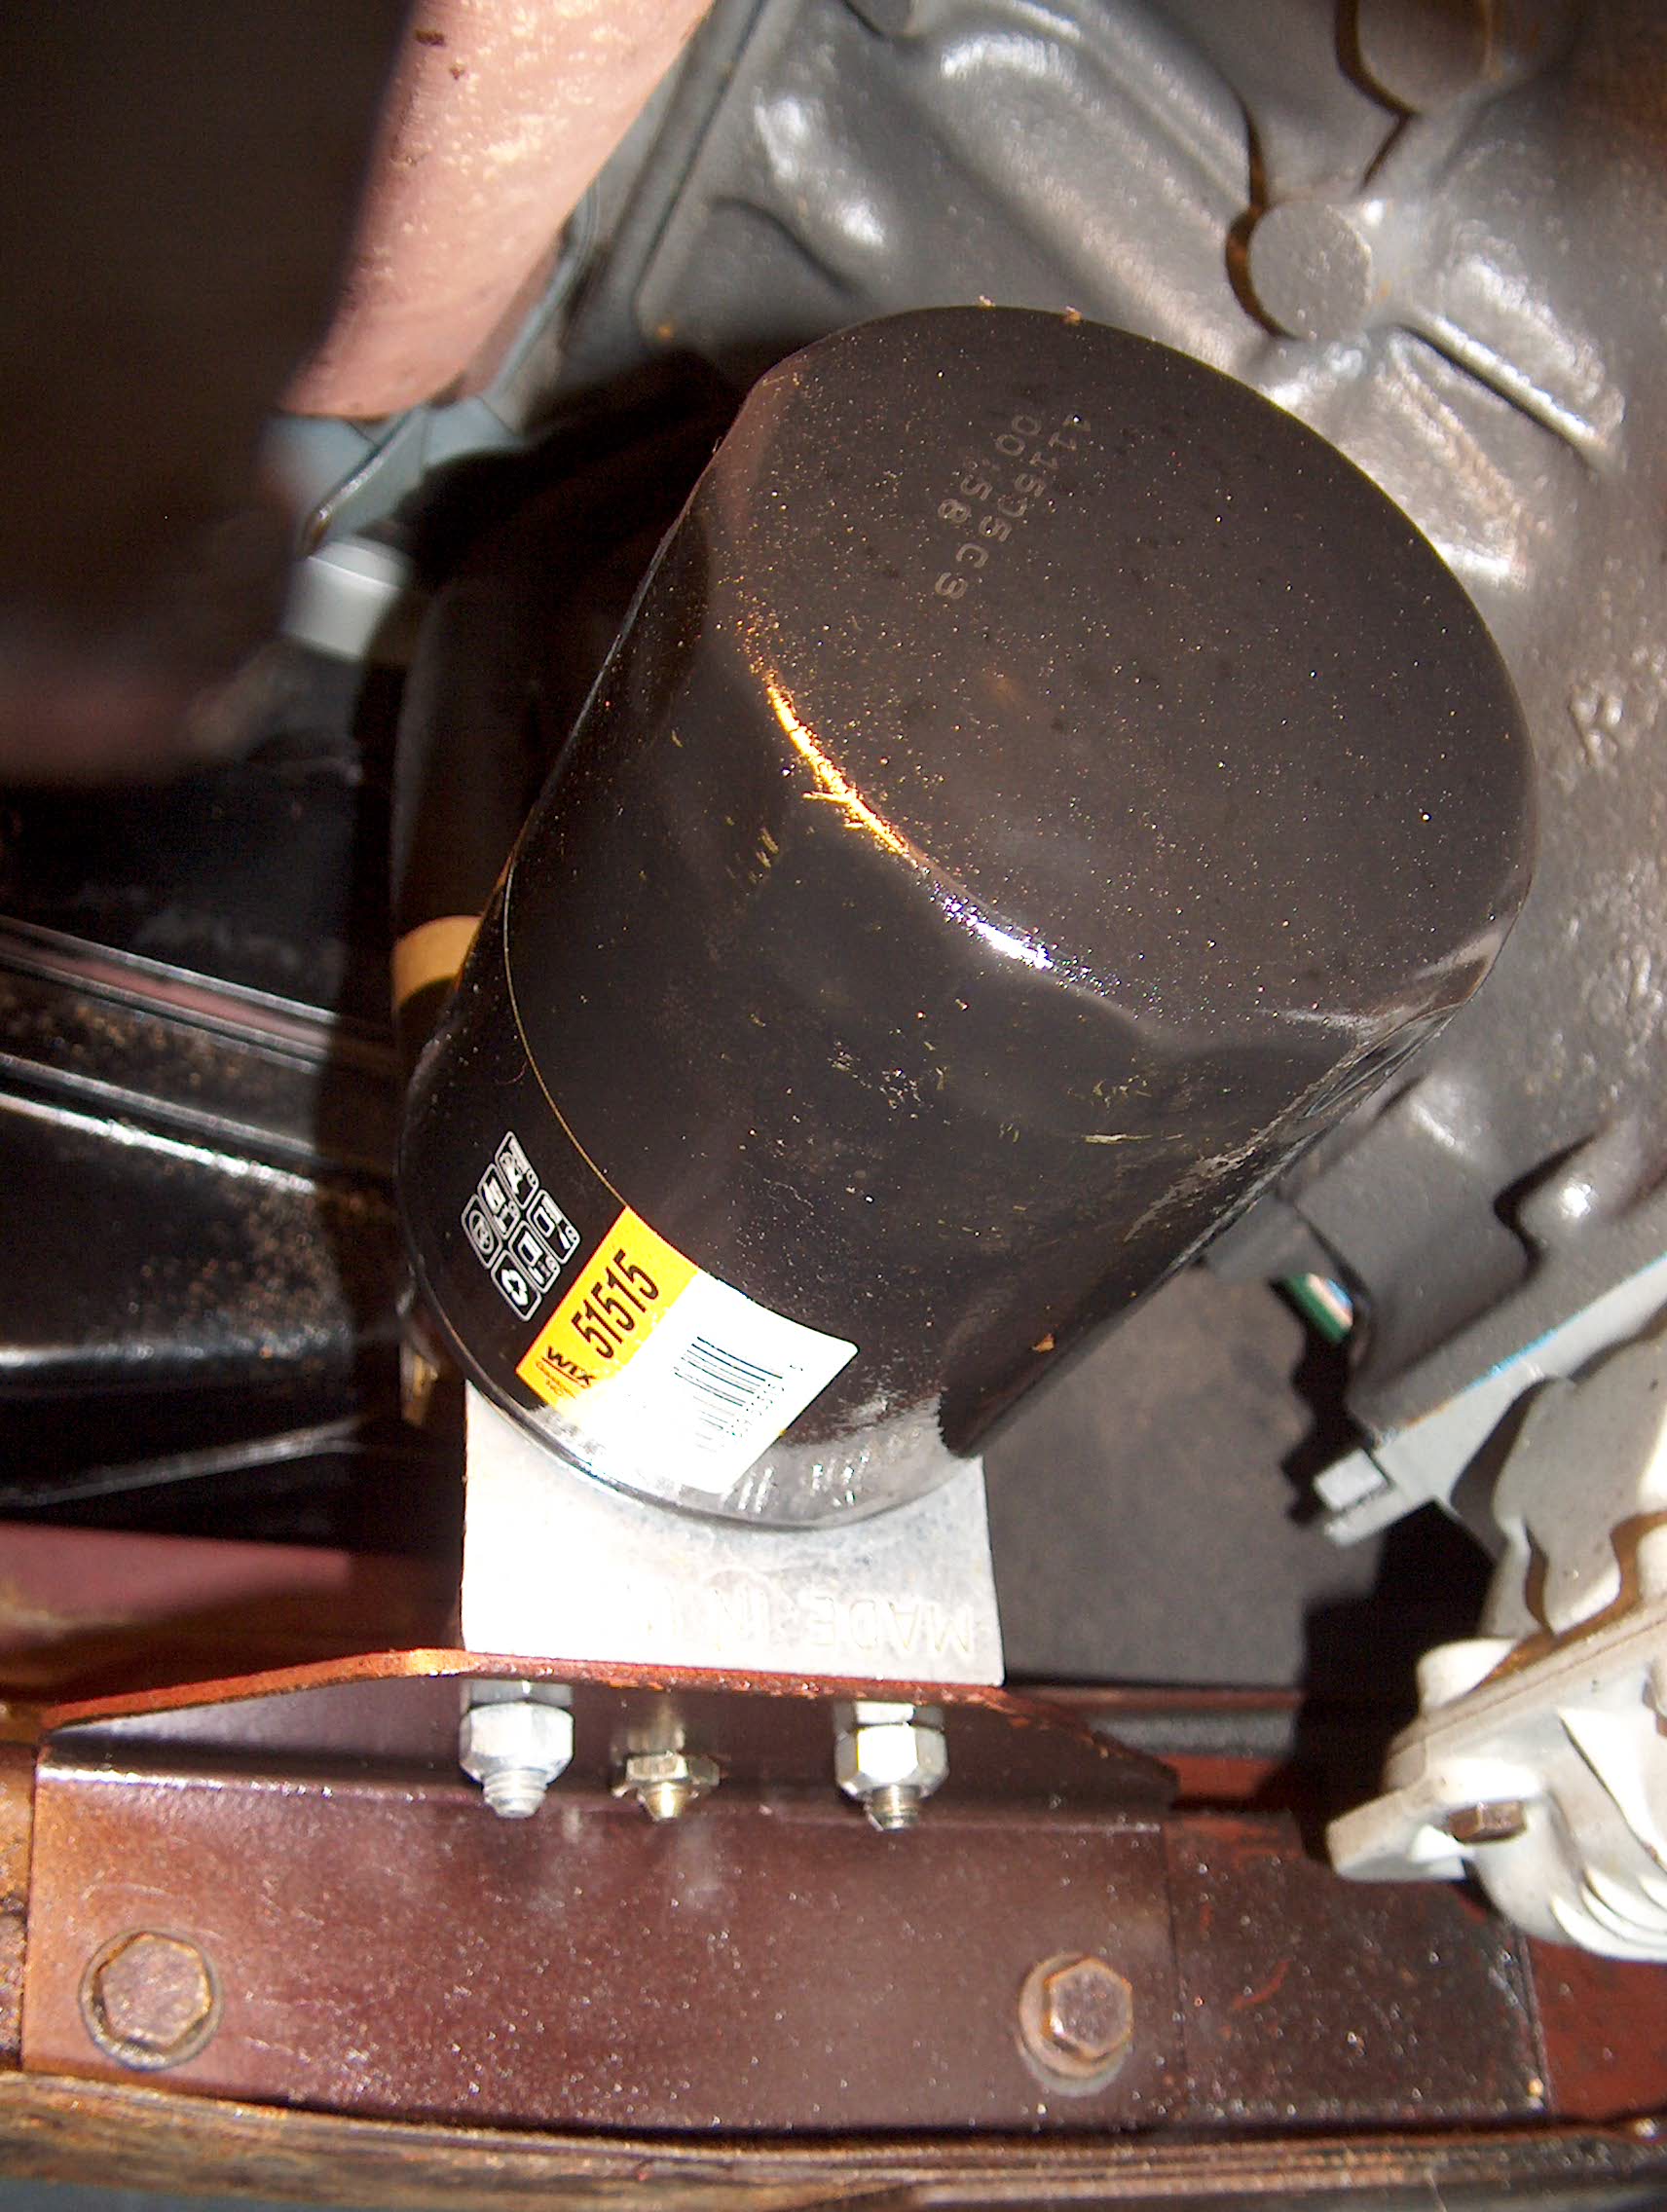
Figure 1: The oil filter located in place of the intake resonator. |
The CX engine bay is very crowded to say the least. I've seen a relocation done where the filter was a large flat square design and was positioned above the transmission. But that approach blocked access to other accessories. Our goal in relocating the oil filter was to put it in an easily accessible location but not interfere with other equipment and access.
The later CXs use a small air chamber (a canister) to reduce induction noise. This canister is located on the right sub-frame, behind the radiator and in front of the engine. Nice idea, however almost all CX's I've seen with this canister it's been broken. Once broken it loses its ability to seal the air cleaner becoming an unfiltered source of air intake (it is connected to the air cleaner housing after the filter).
During our latest engine overhaul project, on our 1987 CX 25 Safari, we tackled this relocation project. We had already decided to remove the intake canister and plug the hole in the air cleaner. After looking around the engine bay I decided that the oil filter would fit very nicely in the old resonator position.
The relocation kit
This article discusses the relocation using a kit readily available from Summit Racing (part no. SUM-3295 at www.summitracing.com). It costs $32.95 and is well made from cast aluminum with brass hose fittings. It comes with adapter plates for the two basic filter sizes so it will fit most any engine. They also provide eight feet of special hose, the clamps, and detailed instructions.
There are two main parts to the oil filter relocation kit, the piece that attaches in place of the filter, and the piece that holds the filter in it's new location. These two pieces are connected using two lengths of hose. One hose connects the 'OUT' port from the engine to the 'IN' port of the new filter housing. The other connects the 'OUT' port from the new filter housing to the 'IN' port of the engine adapter. Keep in mind that the 'IN' port is the center port.
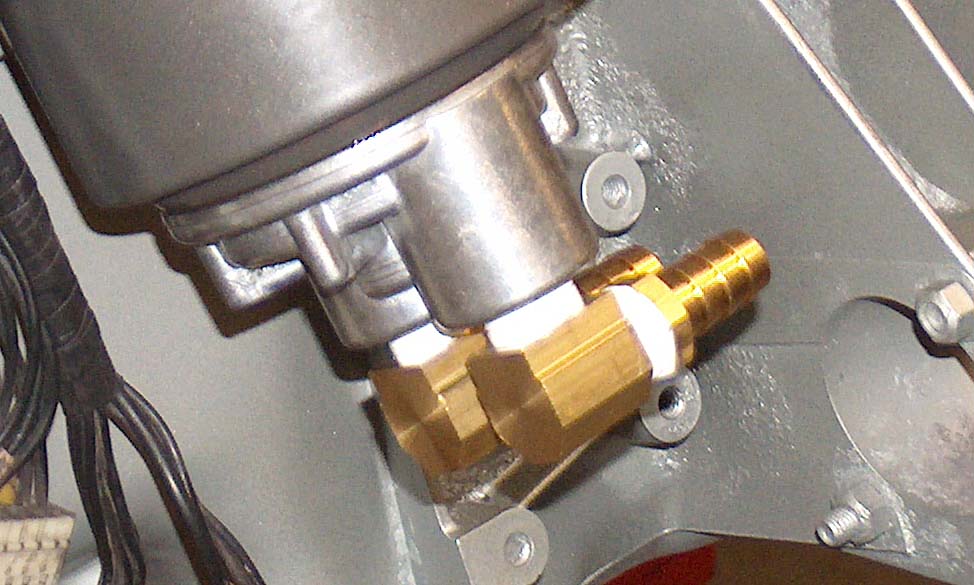
First let's prepare the oil filter adapter. There isn't a lot of room to route the hoses so we will use two right angle adapters for the hose connectors. (Note: You'll also need two right angle adapters for the other end, so get four.) Screw them into the adapter using Teflon tape. Position the openings so they point to the right, parallel, with the adapter positioned with 'IN' port at the top. Now you screw in the provided hose adapters, again using Teflon tape (no more than 1 ½ wraps is desired). Set this to the side for the moment.
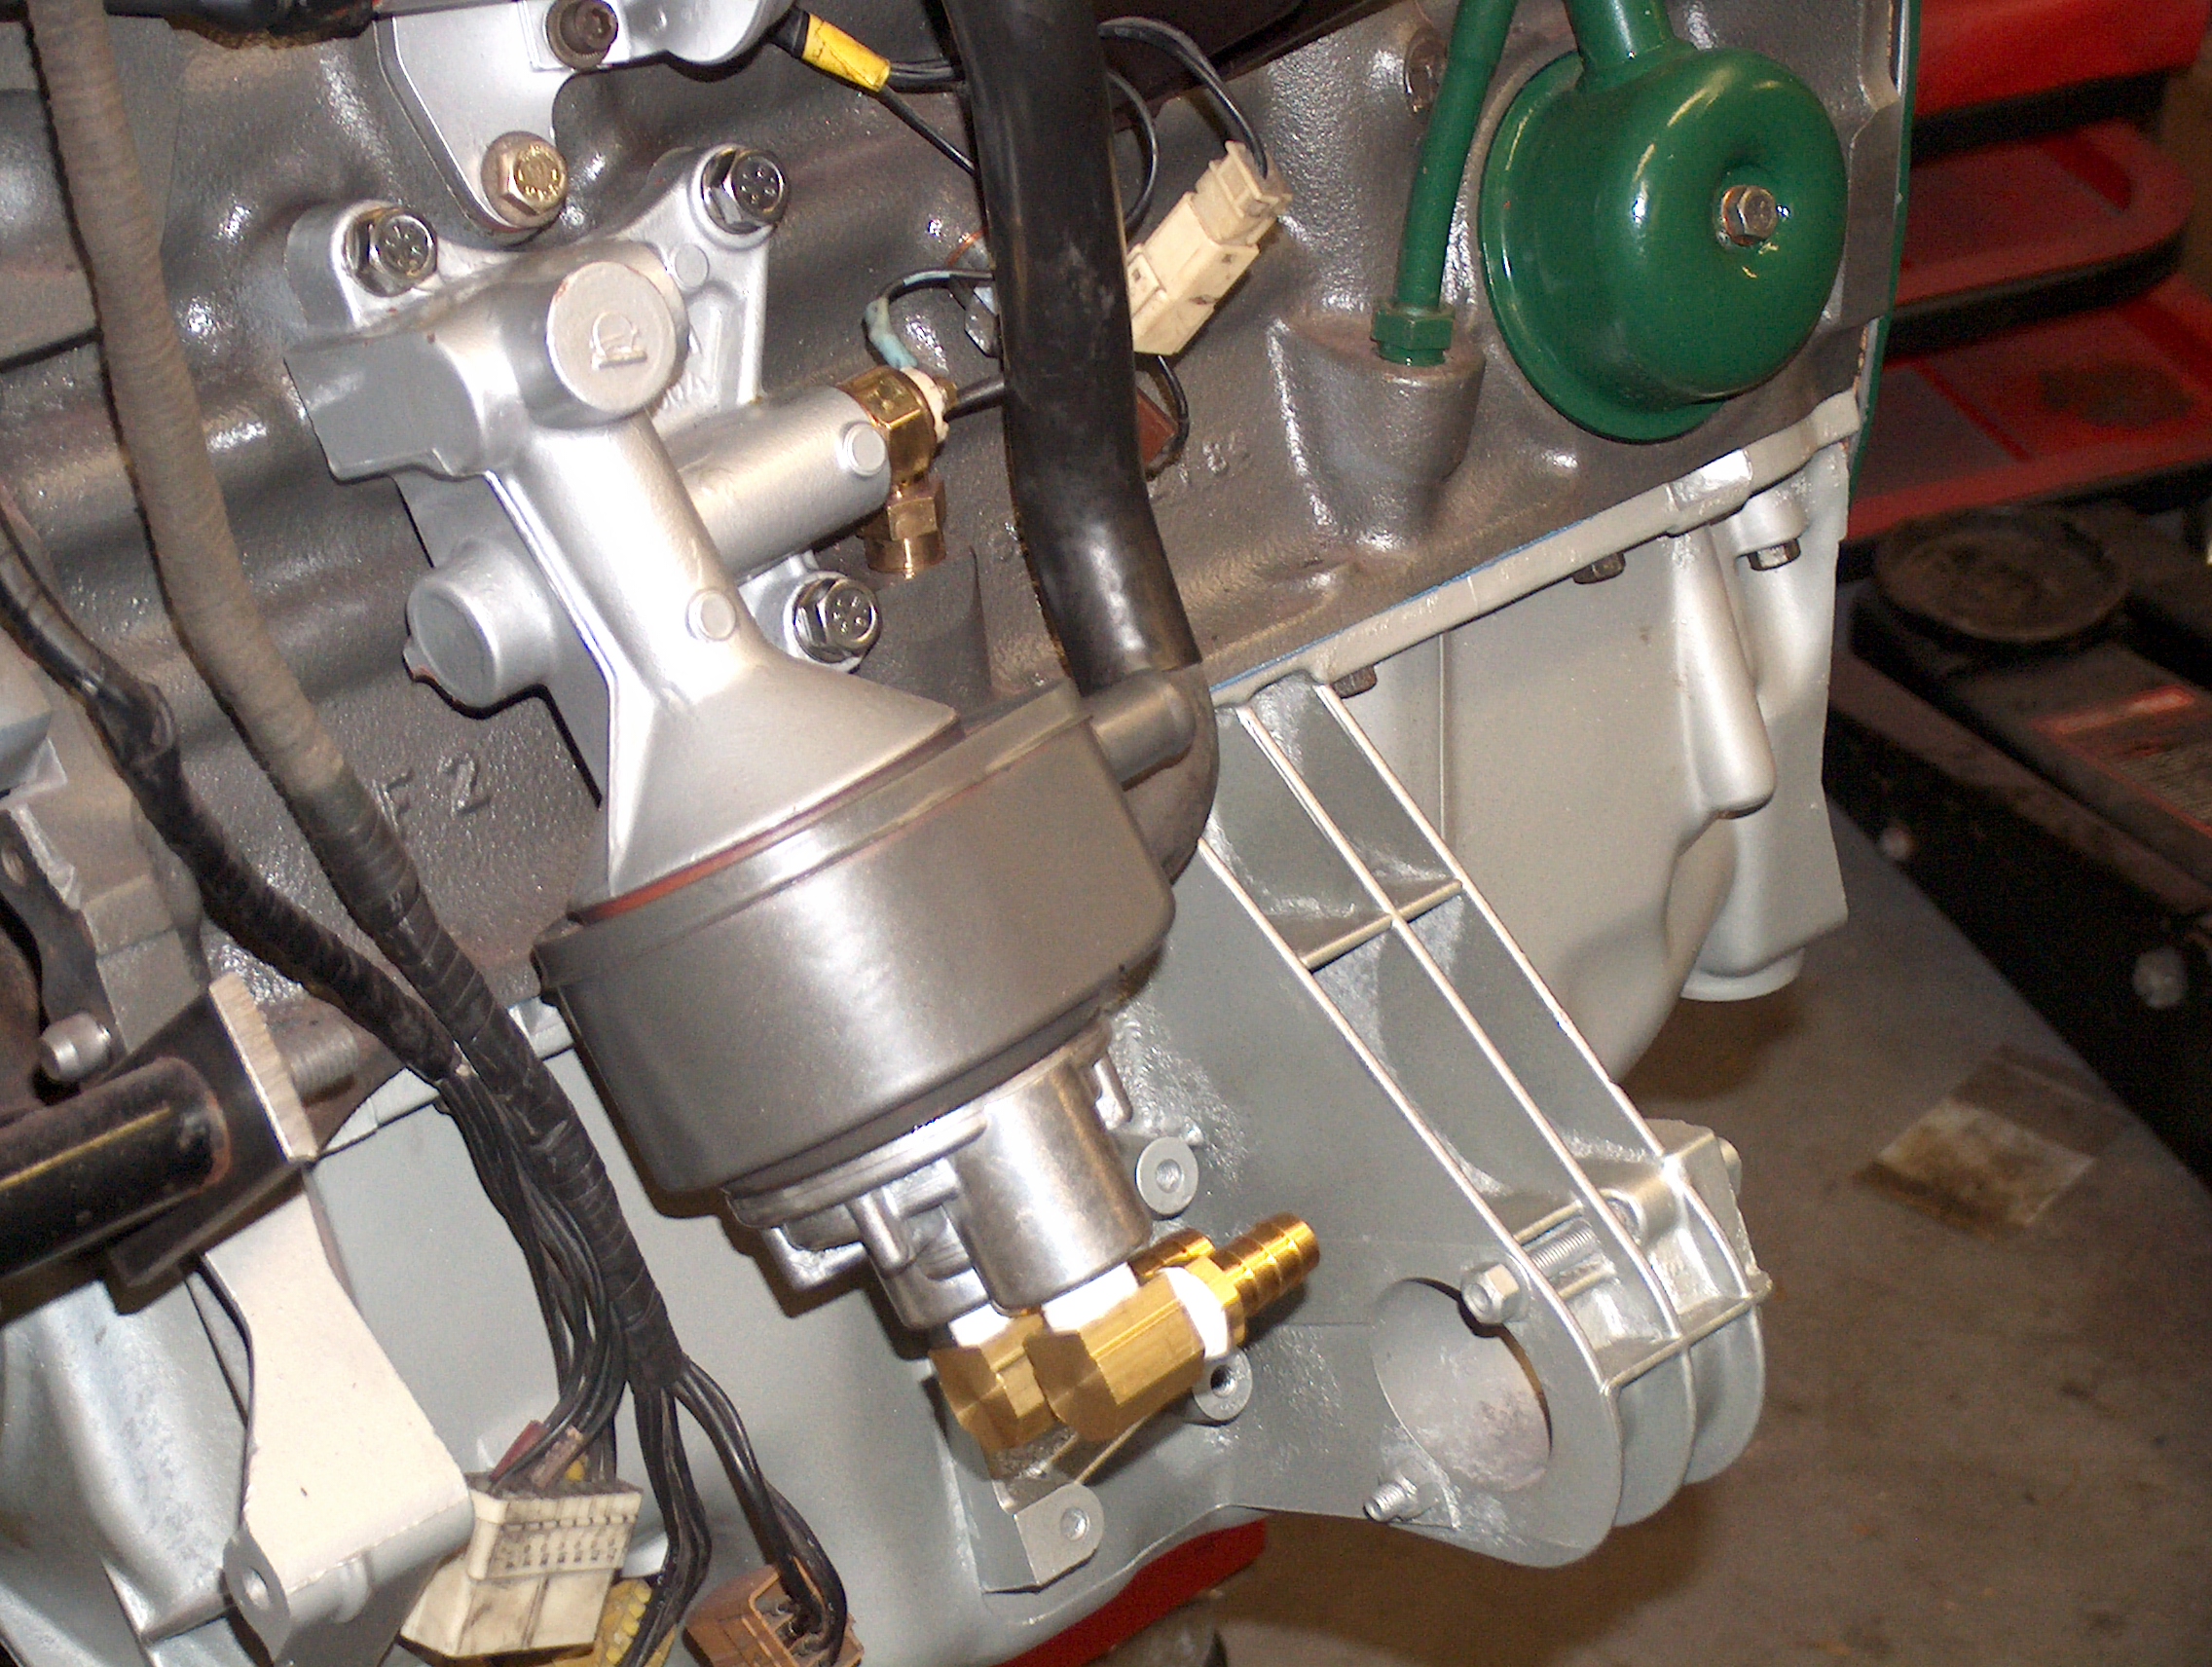
The Athena and Reflex models, and the CX20 and CX22 use the Douvrin engine. Location for these models is easier, but requires a more complex braket, as shown in these photos. This example used aluminum sheet that was easy to work with, but is fairly mild and flexes easily. I would use mild steel the next time, well primed and painted to prevent corrosion. Note that the braket has an ear to bolt to the transmission mount bolt. A long extension socket is used from the other side of the braket to tighten the bolt.
|
|

|
|

|
|
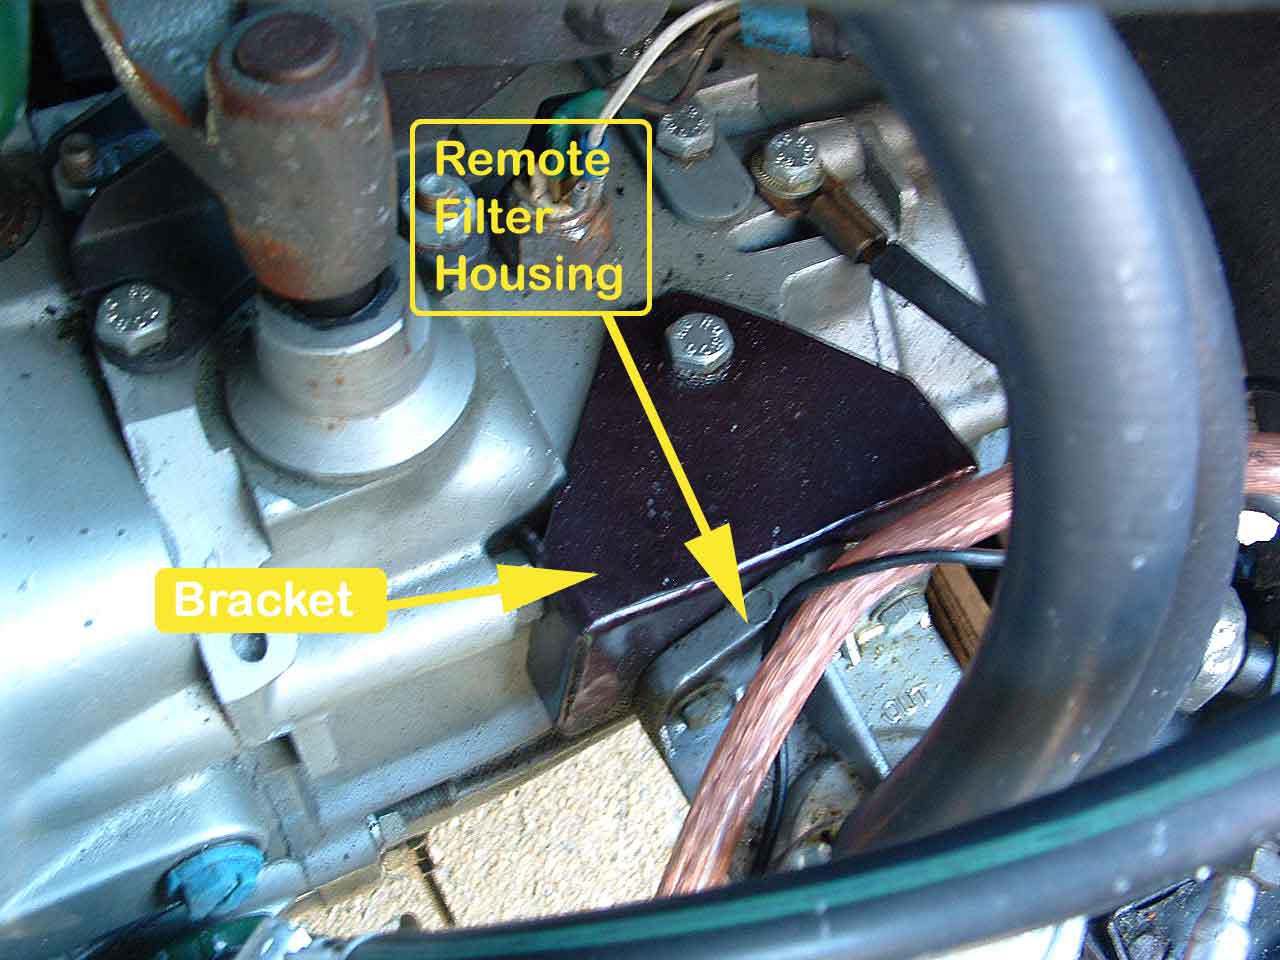
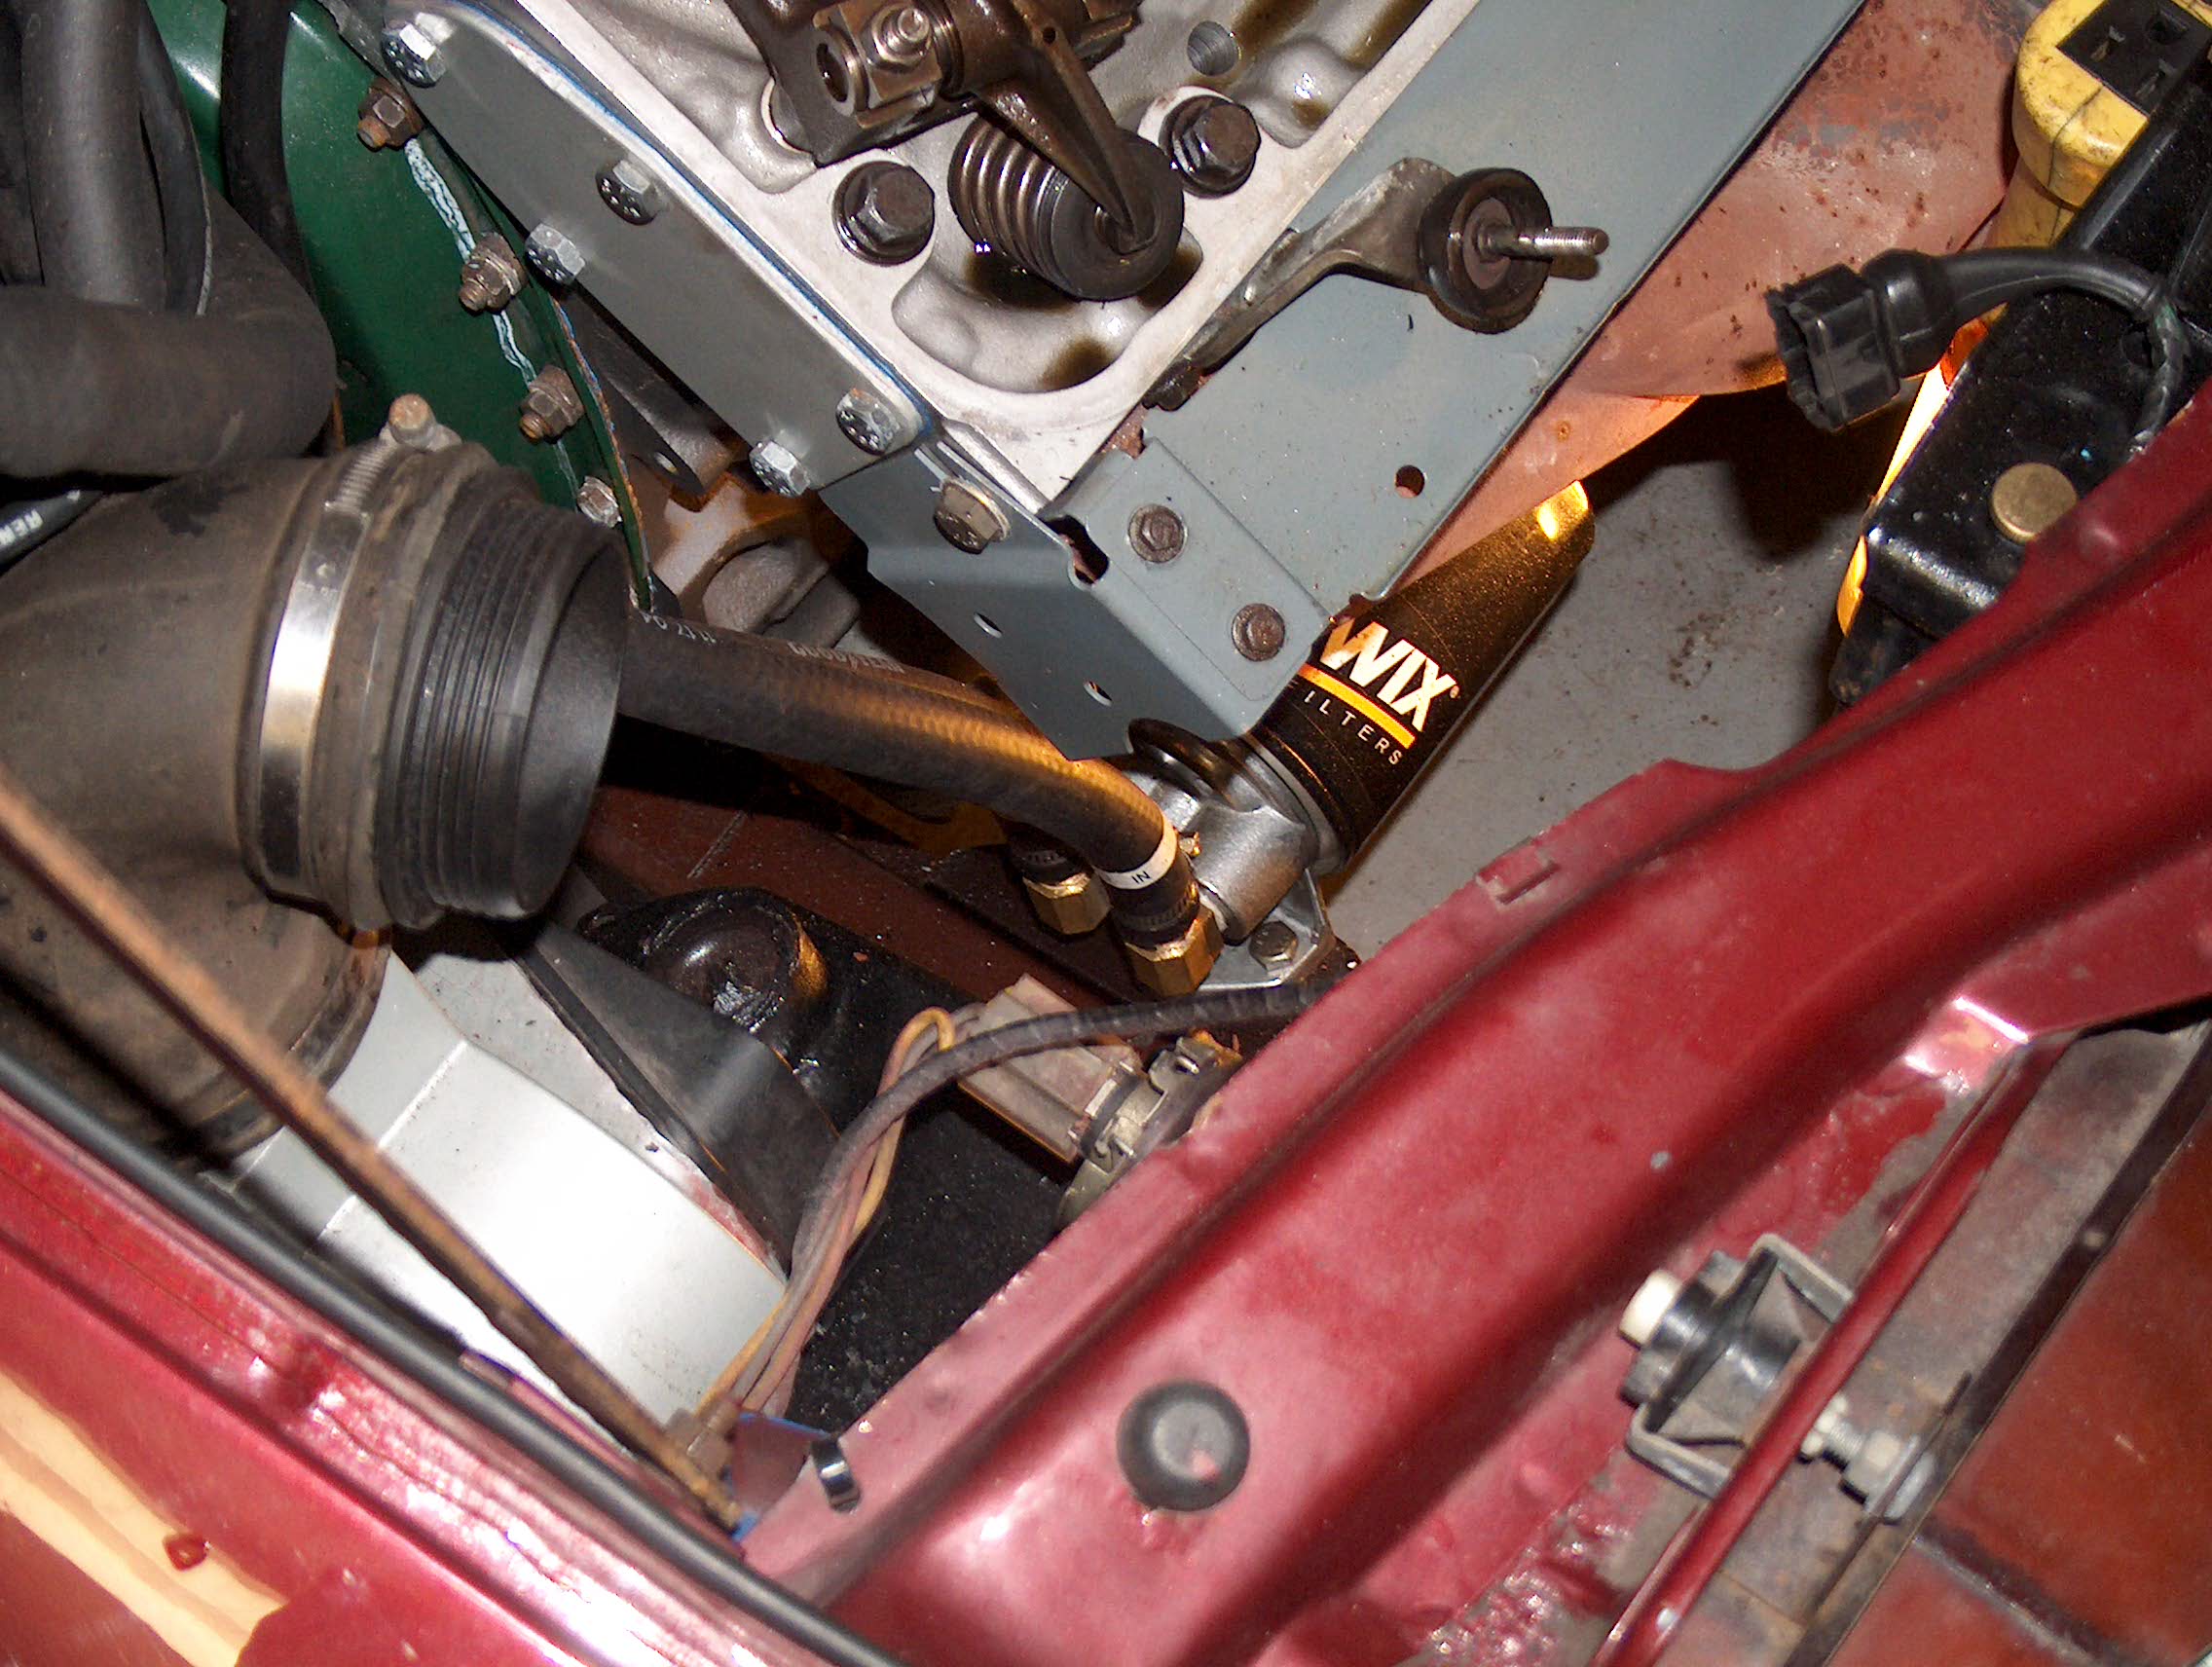
Next prepare and mount the new oil filter housing to the front sub-frame arm. Install the two right angle adapters, using Teflon tape, so they point away from the mounting holes. Then screw in the two hose adapters supplied with the kit. When the adapter is mounted these hose connectors point up Next we purchase a short length of angle iron, 1.5" on each side and about nine inches long. We cut it to mount on the same two bolts used to hold the air intake resonator and drille it to hold the three bolts of the filter housing. Paint it and secure the oil filter housing to it, then bolt it to the sub-frame. For a nice appearance we trimmed the corners so the top of the bracket has a custom appearance.
Now drain the engine oil and remove the old filter. On the later cars I found you can remove the filter by first draining it through a hole in the sub-frame, then passing it over the exhaust and pulling it out through a space on the other side of the sub-frame and chassis. Once the filter is removed you need to screw on the adapter.
Note: We have only done this with the engine being replaced into the bay. We've not done it with an engine in the car so the following is our best advice.
|
|
|
|
With the adapter on the engine you need to position it so the oil hose fittings point to the right (directions given from the driver's seat). There are two approaches possible, but given the difficulty in reaching the filter this is best accomplished with the housing loose from the engine. Take the opportunity to replace the two o-rings in the housing, this is a common source of oil leaks.
The Summit kit comes with about 8 feet of oil hose. Cut it into two equal length pieces to start. You will find labels an absolute necessity because each end must be connected correctly or you will not get oil pressure! On each hose put two labels. On one end label it 'IN' on the other label it 'OUT'. Do both hoses this way but on one end place the labels about 8" from the end (one 'IN' and one 'OUT'). When you are finished each hose has an 'IN' label and an 'OUT' label. When connecting the two housings the 'IN' from one goes to the 'OUT' from the other. (See the kit's instructions.)
With the oil filter housing off the engine you'll have clearance to push the two hoses on the fittings and screw the clamps down tight. Be sure the hoses are attached to the correct fittings (the 'IN' hose to the 'IN' port, etc.). Reattach the filter housing to the engine and route the hoses behind (between the block and the tube) the oil dipstick tube. We put a cushioned clamp around one hose (the one closest to the engine) and bolted it to the engine mounting bracket. The clamp is a tight fit and we actually tapped the mount bracket to accept a bolt (we had to also ream out the clamp for the bolt to fit).
|
|

We then used a nylon tie to hold the second hose to the first. Now route the hose underneath the engine diagnostic bracket. There is no diagnostic plug on this car (the bracket is a holdover from the earlier models) so we cut off the bracket to give the hoses more room. If the bracket cannot be removed then you should route them carefully around the bracket. I strongly suggest you either remove the bracket, or cut it, to prevent chafing of the hose.
With careful routing you can pass the hoses above the timing chain cover and to the front for the oil housing. The hoses are probably too long, so route them beside the fittings to measure, then cut them. Be sure to not lose the labels, you MUST know which hose is which, cut them one at a time! With them cut push the hoses onto the appropriate oil fitting (again, 'IN' to 'IN' and 'OUT' to 'OUT') and clamp them tightly. NOTE: Once you've pushed the hoses onto the fittings you will not be able to pull them back off easily, so make sure you are ready for this step.
You are now ready to put on the filter (which you bought ahead of time to fit this kit, right?). We have a lot of hose between the engine and the filter, and that translates to a longer time for oil to reach the engine. So we pre-fill the oil filter about halfway. More is a waste since it will spill out when you mount the filter. Be careful to mount the filter straight, the kit is very good but the adapter does not make it easy to screw the filter on straight. Be sure to give it that extra turn but not too much.
|
|
Start the engine, watch for the oil pressure light to go out, then check for leaks at all the points you've touched. Hose clamps, bolts holding the housing on, and the filter. If it all appears tight congratulations! Now there's no excuse for not changing the filter!
Final Notes:
This kit is okay, but using standard hoses with standard clamps requires frequent checks to ensure no leaks. Once the hose clamps are settled (after a few hundred miles) they should be okay. When changing the oil or under the hood for any reason it's wise to look for leaks at the filter.
Our next relocation will use steel braided lines with fittings known as 'AN'. These are similar to what you'd see used as OEM (like the oil cooler lines on an SM) and are much more reliable. But also more expensive.
Do your research and make the decision that makes the most sense for you. But relocate that filter!